
Picking your poison:
What kind of chemical peel is best for your skin?
-Lactic Acid: Lactic Acid is one of the safest peels available, and is great as a "first peel". It is safe to use on darker skin tones, and helps to hydrate dry skin. Additional benefits of using a Lactic acid peel are: treats sun damaged skin, improves the appearance of stretch marks, helps with hyperpigmentation, and improves the tone and texture of the skin.
-Glycolic Acid: A more aggressive peel that rejuvenates normal to oily skin, addressing acne, acne scarring, wrinkles, and fine lines.
-Salicylic Acid: Salicylic acid peels are great for oily skin, and are great for the treatment of blackheads.
-TCA: Excellent for acne, lines, wrinkles, sun damage, age spots and general scarring. This peel is deeper than the above three and is longer lasting.
-Jessner's: Great for treating cystic acne.
*Each of these peels can be purchased at varying strengths. I am not an expert on which percentage to choose depending on your experience with peels, but for reference I first purchased the Lactic Acid Peel (35%) and have moved onto the 70%. For first time users, it is very important to use a low percentage. Please check with your doctor and/or use discretion when choosing your strength.
I use the Lactic Acid Peel, and I use both the 35% and 70%. Since the Lactic Acid peel is beneficial to those with rosacea (which I have on my cheeks) and keratosis pilaris, I use the peel on my face and on my arms. The first time I used the 35% peel, my skin did peel, but it was't horrible; my skin just looked like it was extra dry for about three days.
How to use a peel at home:
Step 1: Gather your supplies. You will need a foundation brush (you can use almost any type of makeup brush, but I like to use a dense brush to apply the gel evenly over my face and arms), your gel peel, water, and baking soda. Baking soda neutralizes the peel on contact and stops it from penetrating the skin.
Step 2: Pour a dime sized amount of your peel gel onto your brush and apply evenly over your face (or body), avoiding the eye and mouth areas.
Step 3: Wait 5-10 minutes, then rinse with baking soda and water mixture. Do not leave the peel on overnight. I learned this the hard way!! It was not pretty.
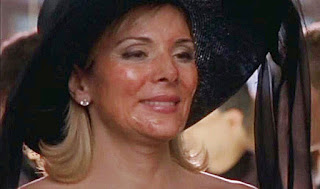
After you use a peel, it is very important to heavily moisturize and to apply sunscreen as your skin will be extra sensitive in the days following the peel. I usually use the peel at night and do not use makeup within at least 12 hours afterwards to let my skin breathe and recover.
I hope this was helpful! I'd love to hear about your experiences with at home peels if you decide to try it!
-Glycolic Acid: A more aggressive peel that rejuvenates normal to oily skin, addressing acne, acne scarring, wrinkles, and fine lines.
-Salicylic Acid: Salicylic acid peels are great for oily skin, and are great for the treatment of blackheads.
-TCA: Excellent for acne, lines, wrinkles, sun damage, age spots and general scarring. This peel is deeper than the above three and is longer lasting.
-Jessner's: Great for treating cystic acne.
*Each of these peels can be purchased at varying strengths. I am not an expert on which percentage to choose depending on your experience with peels, but for reference I first purchased the Lactic Acid Peel (35%) and have moved onto the 70%. For first time users, it is very important to use a low percentage. Please check with your doctor and/or use discretion when choosing your strength.
I use the Lactic Acid Peel, and I use both the 35% and 70%. Since the Lactic Acid peel is beneficial to those with rosacea (which I have on my cheeks) and keratosis pilaris, I use the peel on my face and on my arms. The first time I used the 35% peel, my skin did peel, but it was't horrible; my skin just looked like it was extra dry for about three days.
How to use a peel at home:
Step 1: Gather your supplies. You will need a foundation brush (you can use almost any type of makeup brush, but I like to use a dense brush to apply the gel evenly over my face and arms), your gel peel, water, and baking soda. Baking soda neutralizes the peel on contact and stops it from penetrating the skin.
Step 2: Pour a dime sized amount of your peel gel onto your brush and apply evenly over your face (or body), avoiding the eye and mouth areas.
Step 3: Wait 5-10 minutes, then rinse with baking soda and water mixture. Do not leave the peel on overnight. I learned this the hard way!! It was not pretty.

After you use a peel, it is very important to heavily moisturize and to apply sunscreen as your skin will be extra sensitive in the days following the peel. I usually use the peel at night and do not use makeup within at least 12 hours afterwards to let my skin breathe and recover.
I hope this was helpful! I'd love to hear about your experiences with at home peels if you decide to try it!




.jpg)


