Sunday, April 8, 2012

DIY Wedding Flowers

I decided pretty early on in my wedding planning process that I would be doing most of the wedding flowers myself (my wonderful friends and family were also a tremendous help and I would have lost my mind without them).

I did a lot of research before I made my decision but knew off the bat that DIY flowers was most likely the way to go to save on cost. For the amount of flowers and style I wanted, having a professional do the work would have cost a very pretty penny. I did interview a couple florists, and discovered that I'd save about half the cost by doing DIY arrangements.

The style of our wedding was glamorous, and our colors were white, black, pink, and gold. I planned to use all white roses sitting upon the tallest possible tapered vases.

My inspiration:


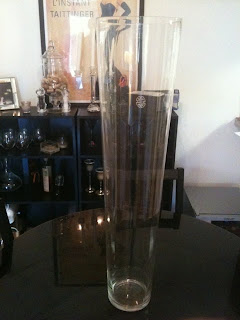
I ordered 12 31 inch, tapered vases from Wholesale Glass Vases International for $25 a piece, which was a steaming deal in comparison to other retailers and wholesale websites I looked at. Their customer service was excellent, and shipping was super fast.

Here's one of the vases sitting atop my kitchen table:
In addition to the vases, I ordered hanging crystal pieces from Koyal Wholesale, you can see the ones I ordered here.

To make your own floral arrangements with fresh flowers, you'll need:
- wet foam bricks
- floral tape
- clear bowl or tray to fit on top of the vase opening
- garden scissors
- buckets
- flowers
- flower food

I ordered 1,000 roses and 50 hydrangeas for all of the centerpieces and bouquets from Costco's wholesale floral department. I will be completely honest and say that the flowers gave me the most anxiety over every other wedding detail. I worried that they'd brown and die under my care, I worried that I'd order them to early and not have them at their prime on the wedding day, and the list goes on. Looking back, I don't regret my decision at all, and I would do it again in a heartbeat.

I was so incredibly lucky to have my friends there for me to help care for the flowers and help arrange them. One of my dear friends had gotten married several months before me used Costco as well, and knew how to care for the flowers once they arrived at my house. She was so incredibly kind to come over the night they arrived, and clipped 1,050 flowers with me.

Here's what boxes holding 1,050 flowers looks like 3 days before your wedding (suitcases, gifts etc everywhere as well):

Before unpacking the boxes, I filled about 20 buckets with water and put the flowers in, in their wrapping to keep the petals safe and closed. After they were all unpacked, we clipped each stem about 1/2 an inch diagonally for better water absorption. This was to be done every other day until arranging the centerpieces, so we only did this a total of two times. Because I was super paranoid, I kept our house as freezing as we could possibly stand to keep all those white flowers alive. Side note: white flowers are very sensitive. One touch to the petals, and they're at risk to brown.

The original plan was to only use roses, but after a trial run, I realized there were too many gaps in the centerpiece, and to fill those spaces would have cost a lot more. Since i love hydrangeas, I decided to add 3-5 to each centerpiece to fill space since they're approximately the size of 5-10 roses a piece. I cannot stress enough how important a trial run is!!!

Here's how to arrange centerpieces in a sphere shape:

Step 1: Cut all flowers diagonally.

Step 2: Soak 1 wet foam brick for about 30 minutes in cold water until completely saturated. Once the flowers are placed into the wet foam, they will receive water and stay fresh for several days.

Step 3: Put the wet foam brick in your bowl (I used clear bowls from the dollar store so that they wouldn't show too much through the vases).

Step 4: Place your floral tape in a criss-cross pattern over the entire bowl, on top of the wet foam. This will be your guide as where to place the flowers and it will keep the wet foam from sliding around.

Step 5: Insert 3 hydrangeas in a triangle shape into the wet foam.
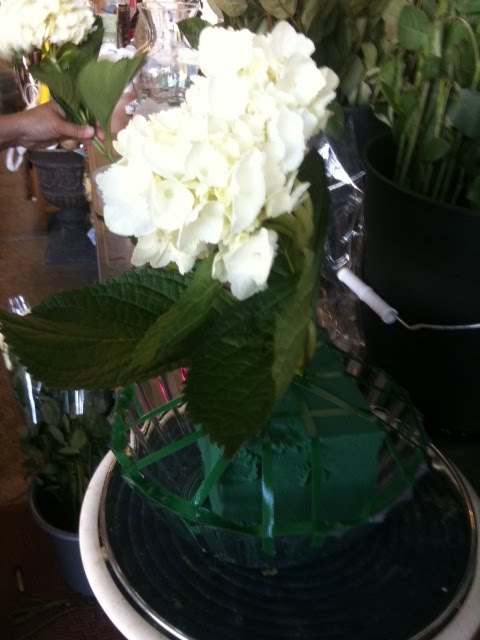
We started by placing one in the middle, and then two around it, in the shape of a triangle.
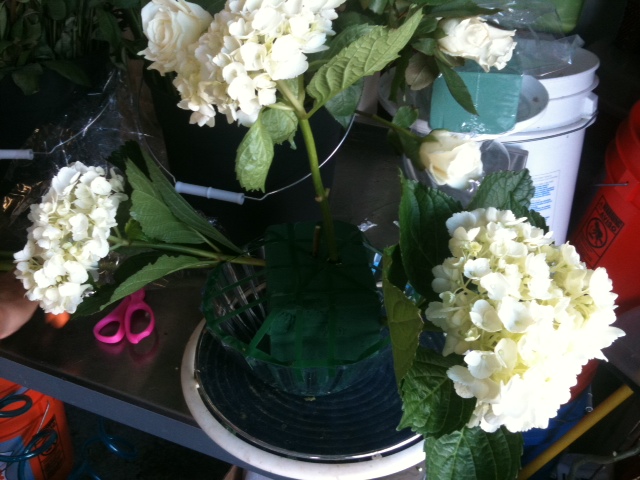
Step 6: Around the hydrangeas, add about 75 roses. Place your bowl directly in/on your vase.

Some of the centerpieces came out a little sparse, but since we had extras, we filled the spaces with extra roses and hydrangeas. Here are a couple before we added a few flowers to fill space:

If you want to add hanging crystal to your centerpieces, you'll need floral picks to loop onto a piece of the crystal hooks, and simply place the picks into your wet foam as desired.

Since I have two cats, I there was no way I was going to keep the completed vases and centerpieces in my house, so I did pay a florist to store them in her shop for one night.

I really hope this was helpful to brides who are thinking of going the DIY floral route. Given how nervous I was about taking on this venture, I wish I had someone tell me it was going to be just fine.
I would love to hear from brides who did their own flowers and what the process was like, and if anyone has questions, please ask!

xo
Lynn


Thursday, March 22, 2012

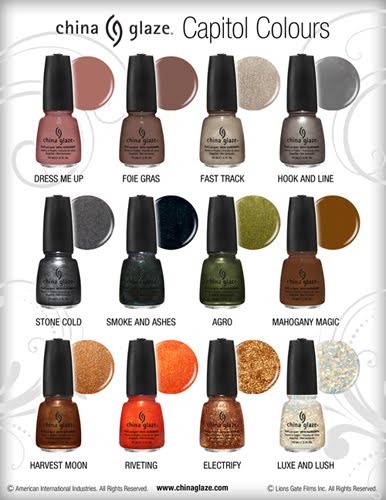
The Hunger Games Nail Polish Collection: Capitol Colours


I don't think I've ever been so excited for a movie premiere in my life as I am for The Hunger Games, which comes out in theaters tomorrow. I read the trilogy, and can't wait to see how the movie compares to the first book.
When I saw the China Glaze Capitol Colours collection inspired by each of the 12 districts in The Hunger Games, I knew I had to pick up some of the colors! My favorites are Electrify, Riveting, and Dress Me Up.
Are there any other Hunger Games fans out there who bought any of these polishes? And an unrelated question: are you team Peeta or team Gale?

Monday, March 12, 2012

Chemical Peels At Home: How To

Chemical peels have been around for a long time-ancient Romans used food acids aka Lactic Acid to peel their skin to reveal younger, brighter looking skin. Today there are so many different chemical peel options, and it can be overwhelming to figure out which is best for your skin.

Picking your poison: 

What kind of chemical peel is best for your skin?

-Lactic Acid: Lactic Acid is one of the safest peels available, and is great as a "first peel". It is safe to use on darker skin tones, and helps to hydrate dry skin. Additional benefits of using a Lactic acid peel are: treats sun damaged skin, improves the appearance of stretch marks, helps with hyperpigmentation, and improves the tone and texture of the skin.
-Glycolic Acid: A more aggressive peel that rejuvenates normal to oily skin, addressing acne, acne scarring, wrinkles, and fine lines.
-Salicylic Acid: Salicylic acid peels are great for oily skin, and are great for the treatment of blackheads.
-TCA: Excellent for acne, lines, wrinkles, sun damage, age spots and general scarring. This peel is deeper than the above three and is longer lasting.
-Jessner's: Great for treating cystic acne.

*Each of these peels can be purchased at varying strengths. I am not an expert on which percentage to choose depending on your experience with peels, but for reference I first purchased the Lactic Acid Peel (35%) and have moved onto the 70%. For first time users, it is very important to use a low percentage. Please check with your doctor and/or use discretion when choosing your strength.

I use the Lactic Acid Peel, and I use both the 35% and 70%. Since the Lactic Acid peel is beneficial to those with rosacea (which I have on my cheeks) and keratosis pilaris, I use the peel on my face and on my arms. The first time I used the 35% peel, my skin did peel, but it was't horrible; my skin just looked like it was extra dry for about three days.

How to use a peel at home:

Step 1: Gather your supplies. You will need a foundation brush (you can use almost any type of makeup brush, but I like to use a dense brush to apply the gel evenly over my face and arms), your gel peel, water, and baking soda. Baking soda neutralizes the peel on contact and stops it from penetrating the skin.
Step 2: Pour a dime sized amount of your peel gel onto your brush and apply evenly over your face (or body), avoiding the eye and mouth areas.
Step 3: Wait 5-10 minutes, then rinse with baking soda and water mixture. Do not leave the peel on overnight. I learned this the hard way!! It was not pretty.


After you use a peel, it is very important to heavily moisturize and to apply sunscreen as your skin will be extra sensitive in the days following the peel. I usually use the peel at night and do not use makeup within at least 12 hours afterwards to let my skin breathe and recover.

I hope this was helpful! I'd love to hear about your experiences with at home peels if you decide to try it!


Sunday, November 20, 2011

My Favorite Self Tanners

I am naturally as white as a ghost. To avoid this white girl problem, I apply self tanner year round. I've tried countless self tanners, and have found the best, most of which I've used for the past several years. 


Clarins Delectable Self Tanning Mousse


I use only use this on my face, neck, and arms. It is absolutely amazing! It has a very light, moist whipped texture and doesn't have a foul smell like a lot of self tanners do. Since I prefer to be darker than my natural skin color year round, I use a foundation a few shades darker than my natural skin color.  Your neck is usually lighter than your face, so it's important to have your foundation match and blend to keep your neck and face the same color. To maintain a blended look everyday, I apply the mousse to my neck (and chest/arms) 1-2 times/week. I do use it on my face sometimes as well, but I don't find it as important to be applied to my face because it washes off much quicker than the rest of my body since I do exfoliate and use the clarisonic brush often.


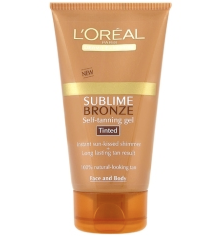
L'oreal Sublime Bronze Self Tanning Gel

I usually only use Sublime Bronze on my legs. I love the smell (it smells nothing like sunless tanner), it has a very light, clean scent. I love that I can see exactly where I'm applying it since the gel is a bronze color.


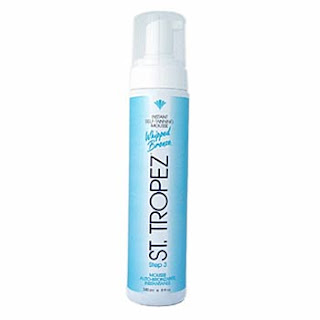
St. Tropez Self Tan Bronzing Mousse

St. Tropez Mousse gives an amazing, natural looking tan when applied correctly. I usually use it during the summer, or layered under or over the Clarins Mousse when I want extra color fast. It dries very fast, so it's important to apply it quickly and evenly to avoid splotchy-ness. When I use this mousse, I always use latex gloves during the application process because it will stain your palms otherwise. I love that it doesn't smell, it doesn't stain clothes, and it is paraben free.


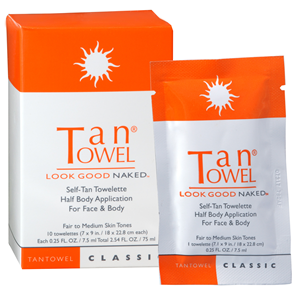
Tan Towel Classic Half Body Application

Tan Towels are one of the best beauty inventions in my opinion! When I'm feeling lazy, or don't have time to spend applying the mousse or gel tanners, I use a Tan Towel. The package says "half body application", but I'm able to use one towel everywhere from my face to my feet. It dries super fast, and has a light citrusy scent. These are great for travel and there's no mess involved. LOVE!

What are your favorite self tanning products?


Thursday, November 3, 2011

My Skincare Routine

I have a complicated relationship with my skin. It's usually VERY dry, and sometimes it's oily AND dry at the same time. Rosacea has been a problem since i was about 10 years old, and was way more of an issue as a child. My skin has always been very, very sensitive, turning bright red when I get my eyebrows waxed or am extremely hot or cold. I struggled with very minor acne as a teen, and now birth control prevents it almost completely. It took me years to nail down a skincare routine that works for me, but I'm finally happy with all of the products I use, and the way my skin looks and feels. Since I love these products so much, I think it's important to share how they've helped my skin. Please take into account that some of the products I use are prescriptions-please see a doctor before trying them!

1. Boscia MakeUp-BreakUp Cool Cleansing Oil: This is what I use every night to remove my makeup. I don't think I'll be using anything else anytime soon because this product is AMAZE. It does the job at dissolving makeup easily with no pulling or rubbing, and it leaves my skin feeling very clean. 
2. Clarisonic Mia: I honestly don't know what I'd do without my Clarisonic Mia. I've been using it for 2 years, about 4 days/week. It was worked miracles with my rosacea by leaving my skin so smooth, and my pores have never been smaller. Run, don't walk to get the Clarisonic if you don't have it! 
3. CeraVe Hydrating Cleanser: My dry skin loves this cleanser, which I use with my clarisonic brush and alone, with my hands on the days that I don't use the clarisonic. It cleanses the skin while maintaining the right moisture balance without leaving any residue.
4. Boscia Smoothing Facial Polish: I use this a few times a week to exfoliate my face, sometimes with the Clarisonic and sometimes without. For years I used St. Ives Apricot Scrub until I was told by an Esthetician that the scrub is damaging to the skin. The crushed apricot pits used in the scrub microscopically tear the skin since they have sharp edges. The Boscia exfoliator uses mannan spheres, which properly & gently exfoliate the skin. 
5. Lactic Acid Gel Peel: I was introduced to peels through blogging about a year ago, and can't imagine not using one now! After a lot of reading, I learned that the Lactic acid peel meets my skin's needs. Lactic acid skin peels are ideal for Actinic Keratosis, dark circles under eyes, dry skin, Eczema & Dermatitis, Melasma, Psoriasis, razor bumps, scarring, sensitive Skin, stretch Marks, sun Damage and tone & texture. I use the peel once every few weeks for keratosis pilaris (on my arms), dry skin, and rosacea. There are lots of awesome tutorials on doing gel peels at home, but I would be happy to provide more information and do a tutorial if that's something that would interest any of you.
6. Retin-A: Retin-A and I have a history of about 15 years. It was prescribed to me as a child to use for rosacea. While it didn't produce great results for me as a child, I still use it more for prevention of acne and wrinkles. I apply it twice a week (sometimes more, but for my already very dry skin, it's not ideal for me to use on a daily basis) under my moisturizer at night.
7. Obagi ELASTIderm Eye Gel: I was introduced to this amazing eye gel from a giveaway on Shasta's blog more than two years ago, and I've since purchased it again. I use it every night, under my moisturizer around my entire eye area (lid, temples, under eyes). Here's a description from Obagi: "Obagi ELASTIderm Eye Treatment Gel helps minimize the visible signs of aging, such as fine lines and wrinkles. It is formulated to encourage the natural production of collagen and elastin while it hydrates and tones for firmer, younger-looking eyes."
8. CeraVe Moisturizing Cream: For years I wasted money used La Mer's moisturizer as my night time moisturizer, but after a visit to my Dermatologist last year, I'm pretty sure I'll be using CeraVe's Moisturizing Cream forever. I cannot sing it's praises enough. While La Mer was a great moisturizer, when I woke up the next morning after applying it before bed, my skin was still dry in the morning. CeraVe's moisturizing cream is a pretty heavy duty moisturizer, so I wouldn't recommend using it during the day, under your makeup. Here's why I love it: "CeraVe's Moisturizing Cream increases the skin's ability to attract, hold, and distribute moisture. It penetrates deep into the layers of the stratum comeum (the skin barrier) to restore the balance of lipids that are essential for an effective skin barrier. It also forms a protective layer over the skin's surface to help prevent moisture loss."
9. iS CLINICAL Youth Complex: Youth Complex is another item I won with the ELASTIderm eye gel from Shasta. Its anti-aging benefits are amazing: clinically proven to stimulate production of collagen and elastin, smoothes and softens skin, provides antioxidant protection, and offers immediate and long-term results. I use it nightly, under or mixed with the CeraVe.
10. Devita Solar Protective Moisturizer: After I raided my sunscreen collection and threw out 99% of it due to harmful chemicals (see my sunscreen post here), I ordered new sunscreen and a new daily moisturizer containing SPF. I found the Devita moisturizer through The EWG, it is listed at #3 as one of the best moisturizers containing SPF.  It is awesome for sensitive skin, provides excellent moisture without being greasy, and doesn't leave that white look to my face like so many natural SPF moisturizers do because it uses a physical barrier sunscreen.


Tuesday, November 1, 2011

Wedding Trailer

I am SO excited to share our wedding trailer! I have to say, I was more excited to receive our wedding DVD than our photos. Rain Studios went above and beyond my expectations, and they were so much fun to work with. I highly recommend them to California brides!
Hope you enjoy!


Wednesday, October 12, 2011

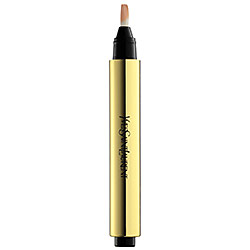
YSL Touche Eclat: Review

As a beauty junkie, I am always looking to try out new products, and this iconic gold tube had been on my mind as I ran out of Benefit's Erase Paste. Despite some pretty bad reviews, I purchased it anyway. What I love about YSL's Touche Eclat is that it is so smooth. Unlike Erase Paste, it doesn't settle in any lines and it stays put.

Many of the bad reviews I read stated that Touche Eclat does a poor job as a concealer.  It is not a concealer. According to Sephora, "Touche Eclat banishes shadows and tired-looking eyes by adding light and creating an instant lift to the eye area. Touche Eclat widens eyes when used between the eyebrows and along the sides of the nose and created fuller looking lips when used in the hollow of the chin and around the contour of the lips. It's formulated for all skin" 


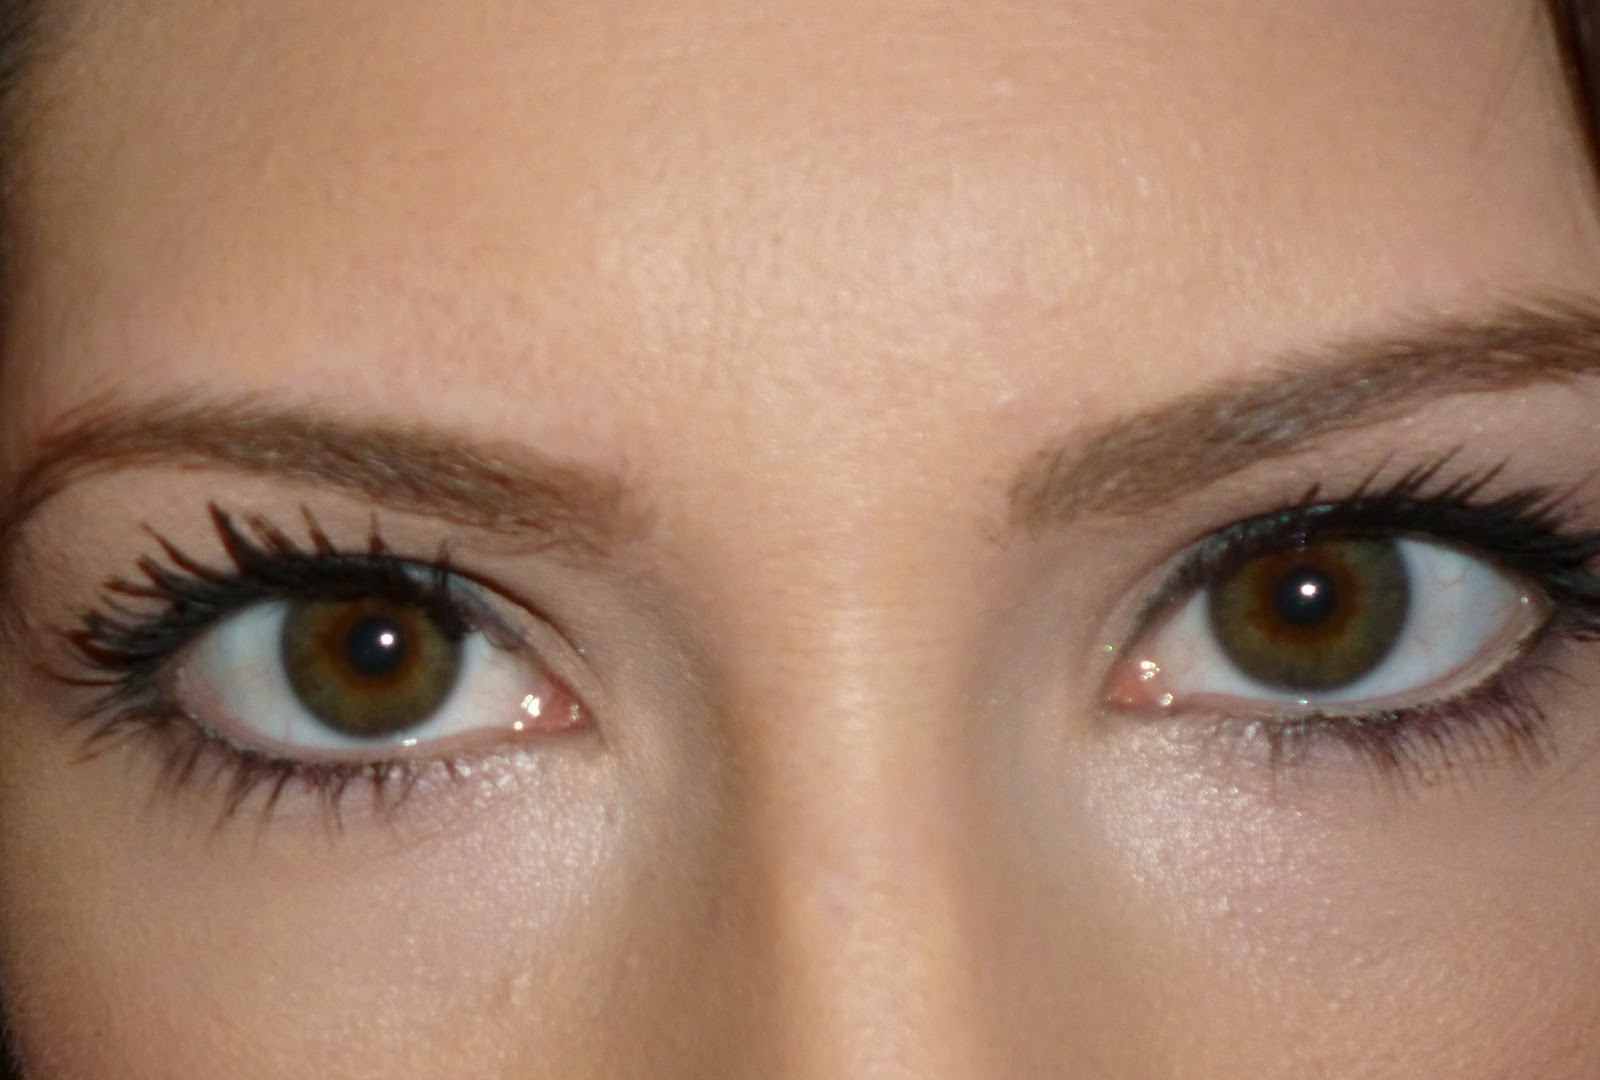
I use it in number 1, the lightest shade after I've used concealer, foundation, and powder underneath my eyes, in the inner corners, and above my lip because I like to have a light, luminescent look especially  under my eye area and feel as though applying it first, second or third diminishes the effect. 

The bottom line: I absolutely love this product and I would buy it again, however, I've seen lots of rave reviews on the significantly less expensive Maybelline Instant Age Rewind Dark Circle Concealer. I would love to know if any of you have compared the two.

P.S. I don't know how you beauty gurus take such flattering, flawless photos! I struggled like a fool for about 20 minutes to get a decent "up close" shot! I guess practice makes perfect.