Friday, December 20, 2013
HOLIDAY {BEAUTY} SPARKLE
Sephora Glitter Eyeliner and Mascara//Sally Hansen Airbrush Legs in Tan Glow//Benefit High Beam//Lorac Liquid Lustre in gold//Physicians Formula Beige Pearl Highlighter//Makeup Geek Utopia Pigment//Bobbi Brown Shimmer Brick//Deborah Lippmann 'Shake Your Groove Thing'//
New Year's is upon us, which means it's the most glittery time of the year! A self admitted shimmer & glitter freak, I'll take any excuse to pile on the shine.
Sephora Glitter Eyeliner and Mascara: Love this for adding a streak of glitter on my lower lash line!
Sally Hansen Airbrush Legs in Tan Glow: This is the most natural looking color in the range of the Sally Hansen airbrush sprays. It gives the perfect golden glow that isn't orange.
Benefit High Beam: My holy grail highlighter that gives a gorgeous, silvery pink glow. I like to use this under a powder highlighter for added sheen.
Lorac Lustre in gold: The most gorgeous gold, glittery liquid that can be used so many ways...I like to add a dab on top of my eyeshadow for extra dimension with a gorgeous shine. This can also be used mixed with your favorite moisturizer for a gorgeous body shimmer.
Physicians Formula Beige Pearl Highlighter: This powder highlighter is the perfect compliment on top of Benefit's High Beam, or on it's own. It gives a gorgeous illuminating glow.
Makeup Geek Utopia Pigment: This is the prettiest pigment I have ever used! It is a rich bronzey gold that gives a stunning foiled effect. I would use this everyday if it weren't for the sake of being boring!
Bobbi Brown Shimmer Brick in Bronze: Hands down the BEST highlighter! I only own the Bobbi Brown shimmer brick in bronze, which I mostly use during the Summer. It gives the most radiant, healthy, bronzed glow.
Deborah Lippmann 'Shake Your Groove Thing': It's like wearing gold sequins on your nails!
What are your favorite glittery/shimmery beauty products?
Monday, November 4, 2013
FALL TREND ALERT//PLAID
Plaid usually conjures up images of 90's grunge style, but it has made a fashionable comeback this Fall. I can't get enough of mixing plaid with leopard...but don't go overboard. Try pairing a plaid blouse with leopard booties or a leopard clutch for an unexpected mix of patterns.
Below are some plaid pieces that I've picked up for Fall (these plaid pants are a current favorite and were recently worn by Kourtney Kardashian...plus they're inexpensive)! The Target blazer is my absolute favorite jacket for Fall. I love the colors and the leather detailing.
How do you like to style your plaid pieces for Fall?
Elizabeth and James Pencil Skirt//Walter Baker Coat//H&M Pants//Intermix shirt//Marc By Marc Jacobs Scarf//Target Blazer//
Friday, October 18, 2013
So Transparent
Transparent accents lend a fresh and playful element to any Fall ensemble.
When I first saw lucite hitting the fashion scene on Spring 2013 runways, I was a bit skeptical and was instantly brought back to my jellies days. The trend has really grown on me, and I can't get enough of crystal clear accessories that have now been all over Fall and Winter 2013 runways.
Apprehensive about splurging on this trend? Forever 21 has several super cute and affordable options. I picked up both cuffs (below) and am loving trying this trend out without breaking the bank.
How do you feel about transparent accessories? How would you style them?
Wednesday, October 16, 2013
SkinSpirit Med Spa Beauty Event

As a self proclaimed beauty and skincare-aholic, I was thrilled to attend SkinSpirit's Beauty Blogger event last week.
Tucked in the charming Strawberry Village boutique shopping center in Mill Valley, the relaxing oasis that is SkinSpirit was the perfect way to end a busy week with sweet treats, bubbly, luxe beauty services including Botox, VelaShape, microdermabrasion, and skin analysis (not to mention the company of fabulous bloggers)!
Necklace twins with the beautiful and super sweet Sascha.
While most keep hush-hush on some med-spa services...ahem, botox, fillers etc, I have no shame admitting that I tried Botox for the first time.
The fine lines that I had on my forehead have bothered me for years. Yes, I am in my mid twenties, and yes, I know it sounds vain. But who isn't?!
So, what is it like?
- At first I was absolutely terrified. You couldn't pay me to voluntarily go and have blood drawn. It is about the last thing I ever want to do. So naturally I was very hesitant about trying Botox.
- The nurse who administered the Botox to my forehead was the sweetest person ever. She was incredibly knowledgeable and made me feel as comfortable as possible.
- My biggest problem area are the horizontal lines that
arewere on my forehead, and the nurse advised that I get a shot between my brows as well to make the entire upper portion of my face look as smooth and natural as possible. Didn't think of that before! - Back to the fear of pain and needles. Before getting the shots, I held an iced balloon to my forehead to help numb the area.
- I got a total of 6 shots (12 units) and each one felt like a tiny pinch. The best (and gross) way to describe the pain is to compare it to popping a zit. I know, TMI.
- It literally took about 10 minutes, from consultation to completion. There's a reason this procedure is dubbed 'the lunchtime procedure'!
- The aftermath: I was told that after two days, I would start seeing results. And after day 14 I will see complete, maximum results. It's now day 5, and I'm already loving how my forehead looks. I can no longer scowl between my brows--love that!
See that semi-smile? Photographic proof that it wasn't bad at all.
So, would I do it again? Yes, in a heartbeat. And I will be going back to SkinSpirit when I'm ready to go for it again.
It’s important to be knowledgeable and to do your research about this
product. Finding an experienced, reputable med-spa, doctor, or nurse is key. Botox for sure gets a bad
rap and is somewhat controversial. I find this to be due to lack of
knowledge.
If you're in the bay area in California, I highly recommend SkinSpirit for all of your skincare needs. The staff is incredibly welcoming, experienced, and knowledgeable. They have three gorgeous locations, and have pretty much every treatment you can imagine.
Tuesday, July 30, 2013
DIY Gold Leaf Agate Coasters
I fell in love with these Jonathan Adler coasters when I visited the Newport Beach store earlier this month, but the $125 price tag for four coasters was less than appealing.
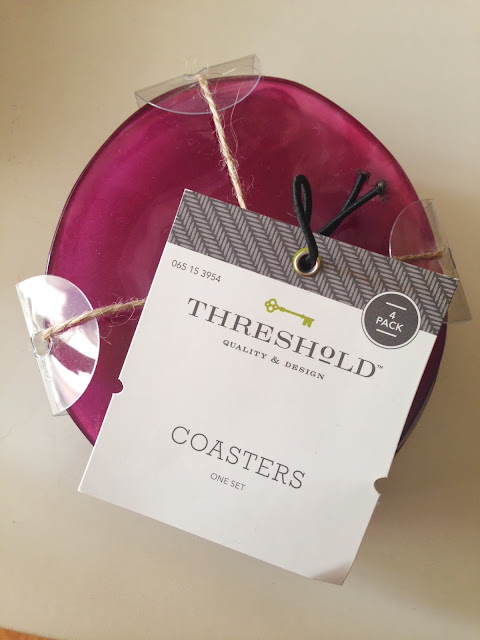
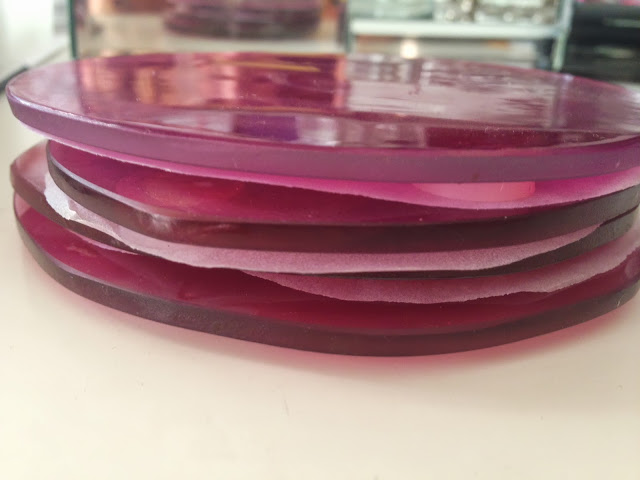
I'm pretty sure I squealed when I saw these Threshold faux agate coasters at Target for just $10, and I had grand plans for them.
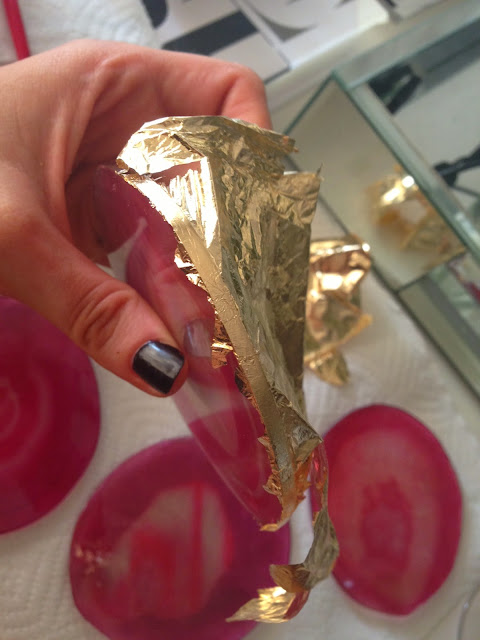
After purchasing a gold leafing kit from Michaels for $10, I was ready to glam-ify my coasters. The kit includes an adhesive, four gold leaf sheets, and a sealant.
Step 1: Apply Adhesive with a brush (I used an old eyeshadow brush) where you want to apply the gold leaf. Let it sit for about 15 minutes, until it becomes tacky.
Step 2: Take one sheet of your gold leaf and press it onto the edge of each coaster.
Step 3: Gently peel the extra sheet off from around the edges and use the remainder of the sheet on the other coasters. I only used 1 1/2 sheets on all four coasters.
Here's how they look after step 3.
Step 4: Apply the sealer with the same brush to the edges of each coaster to secure the gold leaf, and let dry. It will add a creamy look to the edges (pictured), but it dries completely clear.
...And Voila!
Wednesday, July 24, 2013
HIIT Treadmill Workout
When it comes to cardio, HIIT (High Intensity Interval Training) is the best way to strip body fat without losing muscle. Innumerable studies have found that practicing HIIT reduces body fat quicker and more effectively than steady state cardio. I always start with a three minute warm up, and then alternate between intense and moderate cardio on the treadmill with small rest periods. To get the most out of your HIIT workout, do not spend more than three minutes at a high intensity, and do not spend more than two minutes on a rest period.
You'll see below that I alternate between walking (rest), running (intense), and walking at an incline (moderate-intense). The pink numbers reflect the moderate and intense exercise, and the black represents rest. I do this workout four days per week after weight lifting, and I change up my HIIT routine ever so slightly every once in awhile to avoid muscle memory. This can involve just one extra incline level, or a quicker MPH while I run.
Happy HIIT!!
Monday, July 22, 2013
Inspired By Oscar De La Renta: Yellow Maxi Skirt And A Black Lace Top
Being the Oscar De La Renta and maxi skirt (and dress) lover that I am, I knew I had to re-create this look that I found on Pinterest. How stunning is the delicate lace top with the bright, luxurious maxi skirt?! Perfection.
My take:
Wednesday, July 17, 2013
Thursday, July 11, 2013
Workout Tips
{via}
The following tips are those that I've learned through trial
and error, advice from trainers, and through my own research. Each have made a
HUGE difference in how I feel as well as my results. I wish I had known about
these tips when I started working out so that I could've been more efficient
and pleased with quicker results.
-Drink Caffeine before working out. Caffeine is a stimulant.
It gives you extra stamina and increases your heart rate, improving blood flow
from the heart to the rest of your body, therefore it helps you perform well
during a workout with less fatigue. It also increases the amount of adrenaline
in your system, causing a rush of extra glucose and oxygen to your muscles.
With the extra glucose rushing into the muscles, your muscles will use less
glycogen, which is essentially energy. Instead of using up glycogen as you
exercise, your body will instead begin to burn fat first. This is described as
"glycogen sparing". I like to drink an iced {black} coffee about an
hour before I work out, and I'll drink some as I exercise (with water too, of
course).
-Do all strength training before cardio. Your body uses
stored energy (glycogen) during exercise. When glycogen levels are low, energy
levels will subsequently be low. So, if you do your cardio before strength
training, you'll use up your body's energy source for an intense workout. For
this reason, it's best to lift weights first for maximization of muscle
building and fat loss. I used to always do cardio before strength training, and
after a very kind trainer educated me on the many reasons I was doing things
backwards, I noticed a HUGE difference in my energy levels, muscle growth, and
fat loss. If I take a weight lifting class or a cardio based class, I make sure
to incorporate weights before the cardio class or cardio after the weights
class. Most days I work out on my own, and have a strength training/cardio
routine.
-Eat carbs before your workout, and fill up on protein after
your workout. Here we go again
with glycogen talk! Eating carbohydrates about an hour before a workout will
load your muscles with preferred energy, AKA glycogen. This doesn't mean you
should eat a baguette or 10 candy bars! I usually eat 1-2 mashed sweet potatoes
or 1-2 brown rice cakes topped with raw almond butter before a workout. The
American Journal of Clinical Nutrition published an article stating that
consuming protein after your workout will replenish your muscles to promote
growth and repair. Not eating protein afterwards is almost counterproductive.
This is why you'll see some people downing a protein shake as they finish a workout
and leave the gym. I am not a fan of protein shakes, so I bring my protein
pancakes with me and eat a couple after I complete a workout.
-Practice High Intensity Interval Training {HIIT} Cardio. Conventional cardio wisdom says
that doing cardio for a long time at a steady state is the most beneficial for
fat loss, but several studies have shown that this is complete hogwash. When
you do cardio at a steady state for long periods of time, your muscles will
deteriorate, and they will lose the ability to absorb glucose, thus you will
lose muscle tissue. HIIT is described as "A strategy that involves
alternating periods of short intense anaerobic exercise with less-intense
recovery periods." I will be sharing my HIIT workouts next week!
Tuesday, July 9, 2013
DIY Boyfriend Jeans
I had these very old bootcut jeans in the back of my closet waiting to be DIY-ed for years. I am the anti-pack rat and get rid of clothing that I don't wear or that doesn't fit, so it was meant to be that I saved these two sizes too big, out of style jeans! I knew I wanted another pair of boyfriend jeans, as the one pair I do own are light blue and are pretty distressed.
Super unflattering and too big!
STEP ONE: Mark your jeans where you want to cut them. I wanted the bottom of the jeans to hit my shin a few inches above my ankles.
STEP TWO: {Not pictured} Cut the bottom of the jeans in a straight line across at the place marked.
STEP THREE: {Not pictured} Roll the cut-off portion to cover the frayed edge that was cut and sew to secure at seams. I actually pulled mine in a bit as well to eliminate more of the flare from the bootcut shape. Don't fear the sewing part--it's very easy with just a needle and thread. This part took me 30 minutes total for both sides.
STEP FOUR: Place the cardboard underneath the area(s) to be distressed to protect the other side of the jeans.
STEP FIVE: Take a razor blade or exacto knife and gently move it across the area you want your jeans to be distressed. Gently remove excess jean fuzz that will ball up as you distress.
I distressed the pockets and both sides around the outer thigh and hip. I'm considering adding some more distressing, but it's better to take it slow if you're not sure how much distressing you want.
TA-DA!
Tuesday, July 2, 2013
Disneyland Outfit
Last weekend was sweltering hot in LA, and being at Disneyland on one of the highest record temperatures in the last year was *extra* special. I wore a slouchy Zara tee, a light, airy pair of scalloped shorts and flat sandals--a similar outfit that I posted in my "What To Wear To Disneyland" post.
Zara Tee, similar//Old Navy Shorts, similar//Target Sandals//Bag, similar//House of Harlow Sunglasses//
On another note, please join me on Bloglovin' as Google Friend Connect is going away. You can stay updated by following me here, and/or stay tuned for new blog posts via twitter and facebook.
Thursday, June 27, 2013
How To Master An At Home Manicure
The Tools:
Cuticle Trimmer//Cuticle Pusher//Glass Nail File//Eyeliner Brush//Nail Clippers//Toothbrush//Cotton Balls//Rose Hand Cream//Small Hand Towel//Nail Buffer//Cuticle Remover Gel//Orly Bonder Base Coat//Out The Door Topcoat//Nail Polish Remover//Spray Bottle (not pictured)//
Step 1: Remove your current nail polish if you're wearing some. I like to use an acetone remover for a quick removal process.
Step 2: Clip and file nails to your desired length and shape. I use a glass file, as classic emery boards are too rough on nails and can create snags.
Step 3: After your nails are shaped how you want, clean them with the scraper that attached to most nail clippers and then dip an old toothbrush in warm, soapy water and scrub each nail.
Step 4: Apply cuticle remover gel to your cuticles, and gently push them back with a cuticle pusher. If you have a lot of extra skin around your nails, use a cuticle clipper and gently remove excess dead skin. Wipe your nails off with a warm, moist towel.
Step 5: (Optional): Buff and shine nails with a buff and shine block.
Step 6: Hydrate your hands with your favorite moisturizer. I love L/Ocittane's Rose Hand Cream, as I'm obsessed with rose scents and it leaves my hands moisturized, not greasy.
Step 7: Create a mixture of about 70 percent rubbing alcohol and 30 percent water in a spray bottle and spray it directly to your nails. This step preps your nails for nail polish by removing oils and also acts as an antibacterial agent.
Step 8: Apply your base coat. My favorite is Orly's Bonder Base Coat. It does what is says it does: bonds the base coat to the nail polish for a longer wear. I love that it's thin too.
Step 9: Apply your nail polish of choice. I chose L'Oreal's Lacey Lilac today. It's the perfect lilac with a hint of soft pink.
Step 10: Remove any nail polish that got on your skin with a thin eyeliner brush dipped in nail polish remover. I like to do this before the topcoat is applied because I find that it helps to do this step before the polish completely hardens.
Step 11: Apply your topcoat. My absolute favorite is Out The Door. And it's true, it dries SO fast, that you can literally be out the door in three minutes after painting your nails.
Tuesday, June 25, 2013
Forever 21 Finds
Scouring the racks at Forever 21 can be daunting and exhausting (at least for me). I've recently been doing a lot of shopping at Forever 21 online for this reason--it's so much easier to find great items online, and I've had better luck with finding different and chic pieces online rather than in store. See below for some of my most recent, favorite Forever 21 purchases, all online now!

Neon Pleated Maxi Skirt//Leather Wrap Bracelet//Square Cat Eye Sunglasses//Lace Trimmed High Low Top//Filigree Cuff//Van Halen Tank//Black Jumpsuit//Tribal Print Dress//
If you shop at Forever 21, do you prefer to shop in store or online?
Thursday, June 20, 2013
Banana Boat Deep Dark Color Sunless Tanner Review and How-To
I'd heard great things about Banana Boat's Deep Dark Tanning lotion, and after using it once, I was hooked! I've gone through two tubes of it, and it's safe to say it's my favorite self-tanner. Major score that it's cheap, and doesn't turn my skin orange! It lasts better than any self tanner I've ever tried, and it gets better with each application for a darker, natural look.
{Left: No self tanner. Right: After one application, 24 hours after applying and rinsing the color guard off.}
The steps I take to ensure an even application:
1. Shave and exfoliate well, especially over knees, ankles, and wrists.
2. Apply body lotion to knees, tops of hands, elbows, ankles and feet after drying off. This will prevent these areas from looking orange and extra dark.
3. Put latex gloves on before applying self tanner to avoid dark palms.
4. Apply self tanner, starting at the feet, massaging in circular motions and moving up to the rest of your body.
5. Remove your gloves and apply a light layer of self tanner to the tops of your hands.
6. Let the self tanner dry for at least 20 minutes. Lock yourself in your bedroom if you have kids or roommates, or make your significant other extra happy while drying.
7. After at least 6 hours, wash the color guard off in the shower with your regular (non exfoliant) soap or just with warm water. This is one of the most important steps. When I've failed to wash the color guard off in the past, I end up with patchy-ness on the inside of my elbows and elsewhere after working out especially. This usually results in having to exfoliate all of the self tanner off and starting from scratch. When you rinse, the color will stay (unless you're using a crappy self tanner)!
8. Keep your tan dark by applying the self tanner following the above steps every other day. If you want extra moisture and are a tan-aholic (like me), use Jergen's Natural Glow in between self tanner applications.
Wednesday, June 19, 2013
Arm Workout Routine
Below is my arm routine, which I do once a week, in addition to bodypump two days per week which includes a killer arm workout!
As I mentioned in my leg post, I don't list the weights that I use because of varying fitness levels. For reference, I use 40 pounds for tricep presses, 20 pounds for tricep extensions, body weight and a 10 pound weight on my lap for dips, and 30 pounds for both regular and half way bicep curls.
Stay tuned for shoulders next!
Monday, June 17, 2013
What To Wear To Disneyland During the Summer
Desire Pink Maxi Dress//Michael Kors Purse//Karen Walker Sunglasses//Sole Society Sandals//Kain Tank//Scalloped Shorts//
I'm so excited to be going to Disneyland later this month--one of my favorite places ever! Staying stylish while keeping cool and comfortable doesn't have to be tricky...a fanny pack and cargo shorts combo is never necessary. Ever.
I'm so excited to be going to Disneyland later this month--one of my favorite places ever! Staying stylish while keeping cool and comfortable doesn't have to be tricky...a fanny pack and cargo shorts combo is never necessary. Ever.
Not even a designer fanny pack. NO.
My tips for dressing for Disneyland....
-Wear light fabrics like cotton or polyester. While they're not the nicest fabrics, they are wrinkle resistant and dry quickly--a must if you like water rides!
-Bring a small cross body purse (I'm still trying to force myself to like them), but hey, they're so much better than wearing a fanny pack!! Carrying a big, heavy purse really does suck when you're walking around all day long.
-Wear shorts (the light fabric rule applies here)--so avoid denim and leather at all costs. Both can be hot, sticky, and takes forever to dry.
-A casual, no fuss maxi dress is a great option for looking cute while staying cool and comfortable. DO avoid short skirts or dresses, as you may have to contort your body and position yourself in certain unflattering ways when getting on and off of rides.
-Wear flat sandals, but avoid those that have multiple buckles. Flats or tennis shoes are very uncomfortable to walk around in if they get wet=lots of dry time, even in the heat.
-Lastly, wear sunscreen!
Thursday, June 13, 2013
{PALM PRETTY}
Palm prints are no longer reserved for tacky, touristy paraphernalia. The palm print is now a wildly popular print that screams Summer!
Kate Upton Aziz Ansari photographed by Terry Richardson at The Beverly Hills Hotel's Fountain Coffee Room.
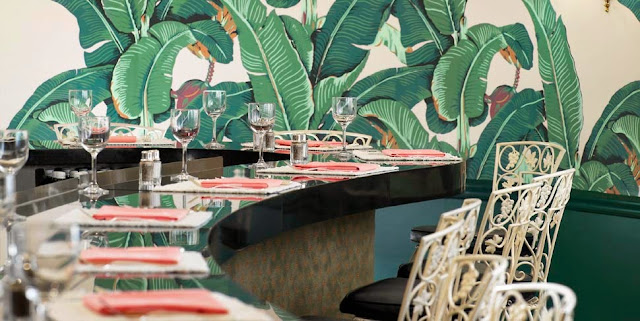 The Fountain Coffee Room in Beverly Hills, where the print originated.
If you're scared of prints, try incorporating a palm printed clutch with any basic Summer ensemble, or add a pillow in your home for an unexpected pop of color.
Swell Bikini Top//Charlotte Olympia Clutch//Juicy Couture Scarf//Palm Print Maxi Dress//Joie Blazer//Michael Kors Pants//Brazilliance Pillow//
Would you wear a palm print?
Subscribe to:
Posts (Atom)


