Thursday, June 27, 2013

How To Master An At Home Manicure


The Tools:

Cuticle Trimmer//Cuticle Pusher//Glass Nail File//Eyeliner Brush//Nail Clippers//Toothbrush//Cotton Balls//Rose Hand Cream//Small Hand Towel//Nail Buffer//Cuticle Remover Gel//Orly Bonder Base Coat//Out The Door Topcoat//Nail Polish Remover//Spray Bottle (not pictured)//

Step 1: Remove your current nail polish if you're wearing some. I like to use an acetone remover for a quick removal process.

Step 2: Clip and file nails to your desired length and shape. I use a glass file, as classic emery boards are too rough on nails and can create snags.

Step 3: After your nails are shaped how you want, clean them with the scraper that attached to most nail clippers and then dip an old toothbrush in warm, soapy water and scrub each nail. 


Step 4: Apply cuticle remover gel to your cuticles, and gently push them back with a cuticle pusher. If you have a lot of extra skin around your nails, use a cuticle clipper and gently remove excess dead skin. Wipe your nails off with a warm, moist towel.

Step 5: (Optional): Buff and shine nails with a buff and shine block. 

Step 6: Hydrate your hands with your favorite moisturizer. I love L/Ocittane's Rose Hand Cream, as I'm obsessed with rose scents and it leaves my hands moisturized, not greasy.

Step 7: Create a mixture of about 70 percent rubbing alcohol and 30 percent water in a spray bottle and spray it directly to your nails. This step preps your nails for nail polish by removing oils and also acts as an antibacterial agent. 


Step 8: Apply your base coat. My favorite is Orly's Bonder Base Coat. It does what is says it does: bonds the base coat to the nail polish for a longer wear. I love that it's thin too.

Step 9: Apply your nail polish of choice. I chose L'Oreal's Lacey Lilac today. It's the perfect lilac with a hint of soft pink. 

Step 10: Remove any nail polish that got on your skin with a thin eyeliner brush dipped in nail polish remover. I like to do this before the topcoat is applied because I find that it helps to do this step before the polish completely hardens.

Step 11: Apply your topcoat. My absolute favorite is Out The Door. And it's true, it dries SO fast, that you can literally be out the door in three minutes after painting your nails.


Tuesday, June 25, 2013

Forever 21 Finds


Scouring the racks at Forever 21 can be daunting and exhausting (at least for me). I've recently been doing a lot of shopping at Forever 21 online for this reason--it's so much easier to find great items online, and I've had better luck with finding different and chic pieces online rather than in store. See below for some of my most recent, favorite Forever 21 purchases, all online now!


Neon Pleated Maxi Skirt//Leather Wrap Bracelet//Square Cat Eye Sunglasses//Lace Trimmed High Low Top//Filigree Cuff//Van Halen Tank//Black Jumpsuit//Tribal Print Dress//

If you shop at Forever 21, do you prefer to shop in store or online? 

Thursday, June 20, 2013

Banana Boat Deep Dark Color Sunless Tanner Review and How-To


I am a self-tanner junkie. I hate being as see through white as I am naturally, and think I just look better with a natural looking tan. I have tried so many different self tanners, both high end and drugstore brands. After my old favorite, the St. Tropez mousse ran out I wanted to try something new. I ordered a knockoff/cheaper version that will remain nameless as I don't want to bash something that may work for someone else. As with some other self tanners I've used, it looked great after it was applied, but once I showered, the tan was gone.

I'd heard great things about Banana Boat's Deep Dark Tanning lotion, and after using it once, I was hooked! I've gone through two tubes of it, and it's safe to say it's my favorite self-tanner. Major score that it's cheap, and doesn't turn my skin orange! It lasts better than any self tanner I've ever tried, and it gets better with each application for a darker, natural look.

{Left: No self tanner. Right: After one application, 24 hours after applying and rinsing the color guard off.}


The steps I take to ensure an even application:

1. Shave and exfoliate well, especially over knees, ankles, and wrists.
2. Apply body lotion to knees, tops of hands, elbows, ankles and feet after drying off. This will prevent these areas from looking orange and extra dark.
3. Put latex gloves on before applying self tanner to avoid dark palms.
4. Apply self tanner, starting at the feet, massaging in circular motions and moving up to the rest of your body. 
5. Remove your gloves and apply a light layer of self tanner to the tops of your hands.
6. Let the self tanner dry for at least 20 minutes. Lock yourself in your bedroom if you have kids or roommates, or make your significant other extra happy while drying.
7. After at least 6 hours, wash the color guard off in the shower with your regular (non exfoliant) soap or just with warm water. This is one of the most important steps. When I've failed to wash the color guard off in the past, I end up with patchy-ness on the inside of my elbows and elsewhere after working out especially. This usually results in having to exfoliate all of the self tanner off and starting from scratch. When you rinse, the color will stay (unless you're using a crappy self tanner)!
8. Keep your tan dark by applying the self tanner following the above steps every other day. If you want extra moisture and are a tan-aholic (like me), use Jergen's Natural Glow in between self tanner applications.


Wednesday, June 19, 2013

Arm Workout Routine

Below is my arm routine, which I do once a week, in addition to bodypump two days per week which includes a killer arm workout!
As I mentioned in my leg post, I don't list the weights that I use because of varying fitness levels. For reference, I use 40 pounds for tricep presses, 20 pounds for tricep extensions, body weight and a 10 pound weight on my lap for dips, and 30 pounds for both regular and half way bicep curls.

Stay tuned for shoulders next!

Monday, June 17, 2013

What To Wear To Disneyland During the Summer


Desire Pink Maxi Dress//Michael Kors Purse//Karen Walker Sunglasses//Sole Society Sandals//Kain Tank//Scalloped Shorts//

I'm so excited to be going to Disneyland later this month--one of my favorite places ever! Staying stylish while keeping cool and comfortable doesn't have to be tricky...a fanny pack and cargo shorts combo is never necessary. Ever.

Not even a designer fanny pack. NO.


My tips for dressing for Disneyland....

-Wear light fabrics like cotton or polyester. While they're not the nicest fabrics, they are wrinkle resistant and dry quickly--a must if you like water rides! 
-Bring a small cross body purse (I'm still trying to force myself to like them), but hey, they're so much better than wearing a fanny pack!! Carrying a big, heavy purse really does suck when you're walking around all day long. 
-Wear shorts (the light fabric rule applies here)--so avoid denim and leather at all costs. Both can be hot, sticky, and takes forever to dry.  
-A casual, no fuss maxi dress is a great option for looking cute while staying cool and comfortable. DO avoid short skirts or dresses, as you may have to contort your body and position yourself in certain unflattering ways when getting on and off of rides.
-Wear flat sandals, but avoid those that have multiple buckles. Flats or tennis shoes are very uncomfortable to walk around in if they get wet=lots of dry time, even in the heat. 
-Lastly, wear sunscreen!

Thursday, June 13, 2013

{PALM PRETTY}

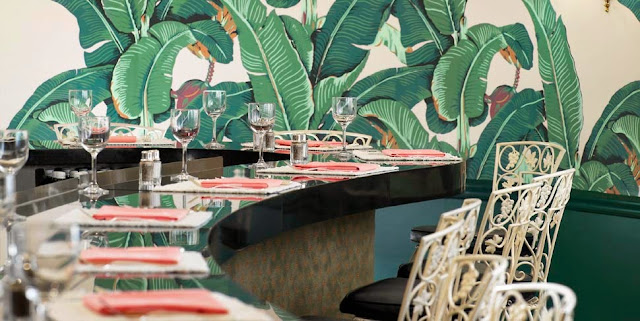
Palm prints are no longer reserved for tacky, touristy paraphernalia. The palm print is now a wildly popular print that screams Summer!
Kate Upton Aziz Ansari photographed by Terry Richardson at The Beverly Hills Hotel's Fountain Coffee Room.
The Fountain Coffee Room in Beverly Hills, where the print originated.
If you're scared of prints, try incorporating a palm printed clutch with any basic Summer ensemble, or add a pillow in your home for an unexpected pop of color.
Swell Bikini Top//Charlotte Olympia Clutch//Juicy Couture Scarf//Palm Print Maxi Dress//Joie Blazer//Michael Kors Pants//Brazilliance Pillow//

 Would you wear a palm print?

Monday, June 10, 2013

Leg Workout Routine

Want an intense leg workout that will bring amazing results? I have the perfect workout routine for you! I know those two sentences sounded like they were straight from an infomercial, but I'm not kidding when I say this is intense. And it works. I do this leg workout one day per week, and I also do bodypump two days per week, which includes a leg workout as well. With a clean diet and consistency, you will see a huge difference in the shape of your legs with this workout. Doing a leg workout at least two days per week is ideal to get stronger and see changes in your body. 

I didn't list the weights that I use below since everyone will be different depending on your fitness level. For reference, I use 70 pounds for squats (on my back), 50 pounds for lunges, no weight for plie squats,  40 pounds for both inner and outer thigh abductors, and 65 pounds for the hamstring curls.

I will be back to share my arms, shoulders, abs, and cardio routines as well. 

Thursday, June 6, 2013

The Look For Less


I wanted these Zara spiked sandals so badly when I first saw them, but I was hesitant to pay $129 for them. I'm glad I waited, because I just ordered the identical Bamboo pair from Amazon. If you want a pair, hurry, because they're almost sold out! 

Tuesday, June 4, 2013

CFDA Awards 2013 Best Dressed


There were so many fashion misses at the CFDA awards this year (in my opinion), but here are my favorite looks from the event:


Left to right: Olivia Palermo in Dennis Basso, Sofia Vergara in Herve L Leroux, Ireland Baldwin in David Meister 

Who was the best dressed in your opinion?